Artificial Grass Turf Diy Installation Guide
Site work: Before starting the installation, walk around the site and do a quick survey of the area and surroundings. Pre-planning helps ensure a smooth installation. Clear the work area, install and place tools for ease of use, and create a path to the work area.
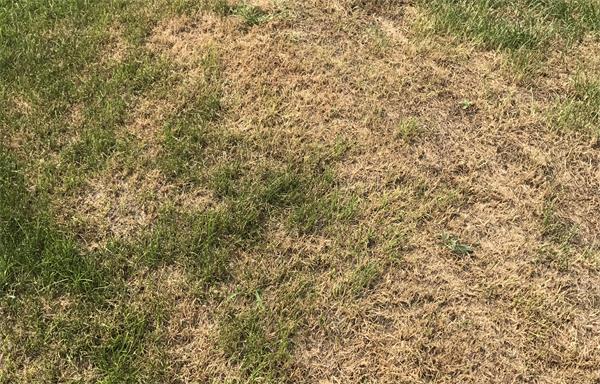
Removing old soil and grass
You will need a sharp shovel, or rent a mechanical turf cutter to remove old grass. Make sure you remove the grass clumps and level the site.
If a sprinkler system is installed, you can pull it up or leave it in place. It's a good idea to pull up any exposed sprinkler heads to help level the ground, and if you or the new homeowner wants to re-sod the lawn, simply reinstall the sprinklers. We expect to dig 2-4 inches down from the ground.
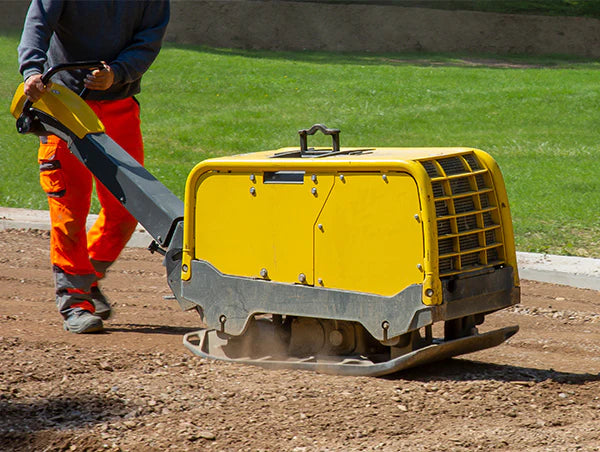
Subbase Preparation
Choosing the perfect sub-base depends on what type of installation you are going for. If you intend to install a putting green, you will need to use decomposed granite to achieve a certain level, while landscaping projects can be done with any crushed stone/concrete mixture, such as a Type 2 road base. A 2-inch layer of base material should be placed on the excavation site, lightly moistened and compacted two or three times. This can be done with a vibratory plate compactor, but smaller applications and hard-to-reach corners should be compacted with a hand tamper. The amount of base material you need to install depends on the depth of the excavation and how much of the pile height you want the artificial turf exposed.
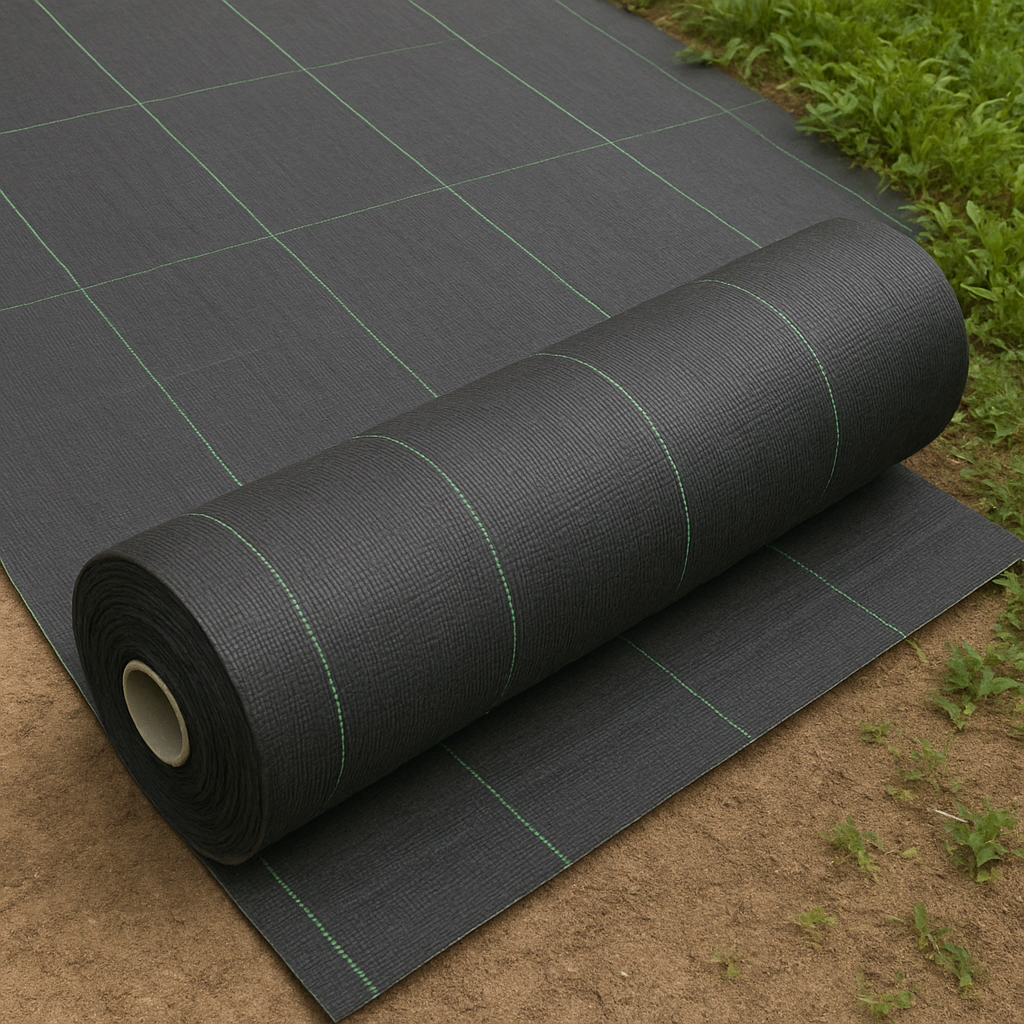
Underlayment
To prevent natural grass from regrowing, it’s recommended to install a landscape fabric—such as our Weed Barrier—either above or below the subbase, depending on local soil conditions.
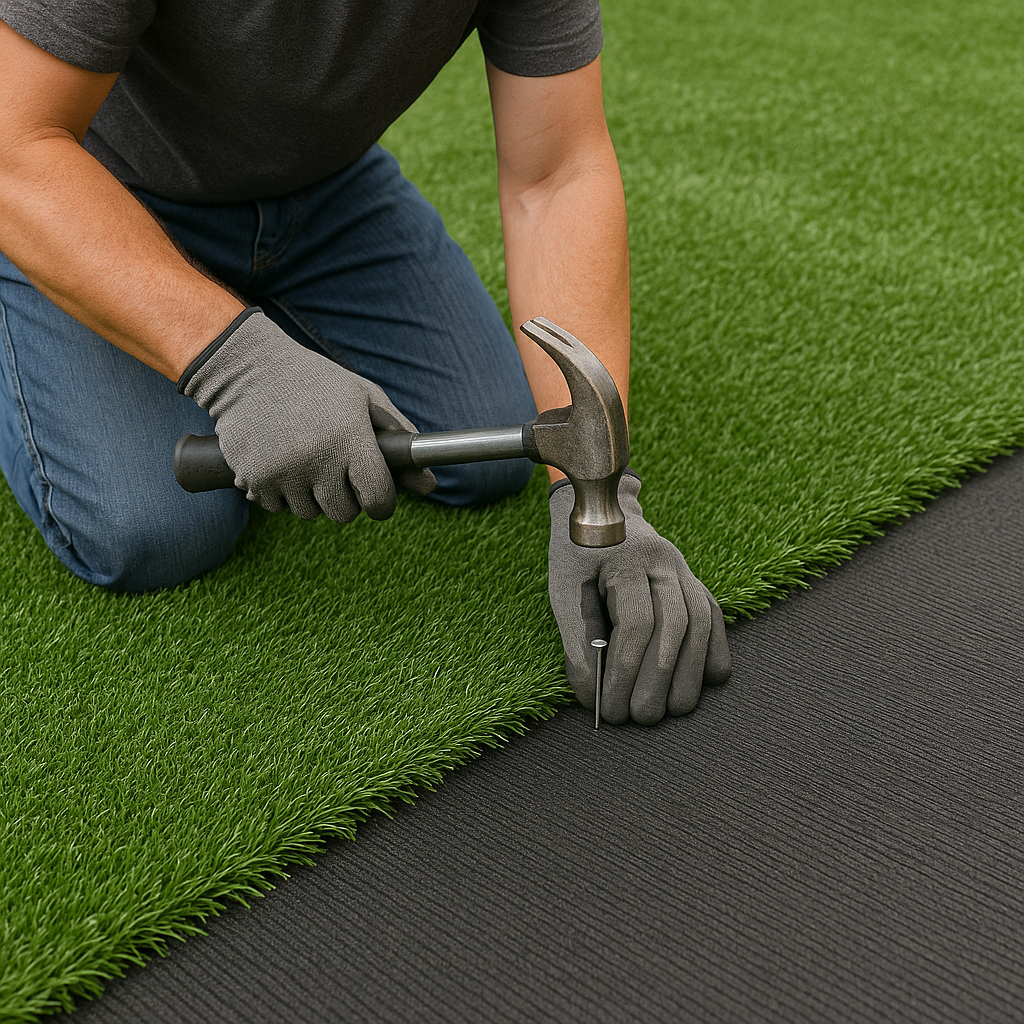
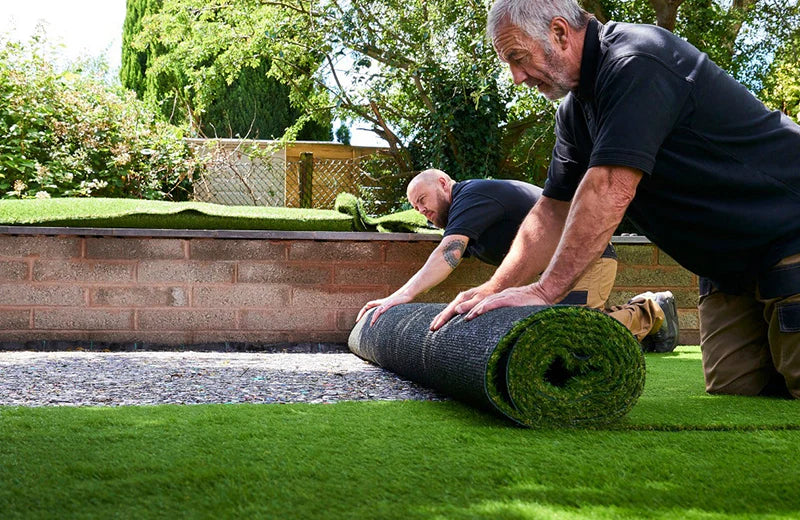
To ensure the grass blades stand upright, place the turf under direct sunlight for 1–2 hours. Before making any cuts, carefully inspect the material. If seams are needed, start by positioning the largest piece and make rough cuts as necessary—leave a few extra inches around the edges for adjustments. Once the turf is properly aligned, secure one edge with nails spaced 6 inches apart and placed 1 inch from the edge. Use a carpet kicker to stretch the turf for a snug fit, anchoring more nails as you go to keep it taut.
The most common way to join turf pieces is with a parallel seam. To do this, create a 12-inch gap between the turf edges and cut a strip of non-adhesive seam tape to the needed length. Nail down both ends of the tape, then apply a line of Supreme Seam glue along the center. Spread the glue evenly using a trowel or a piece of cardboard. Allow it to sit for about 15 minutes or until it becomes tacky. Then, unpin the turf edges and carefully press them onto the tape, one side at a time. Starting at the center of the seam, secure the edges with nails spaced 1–3 inches apart in a staggered pattern along the seam line.
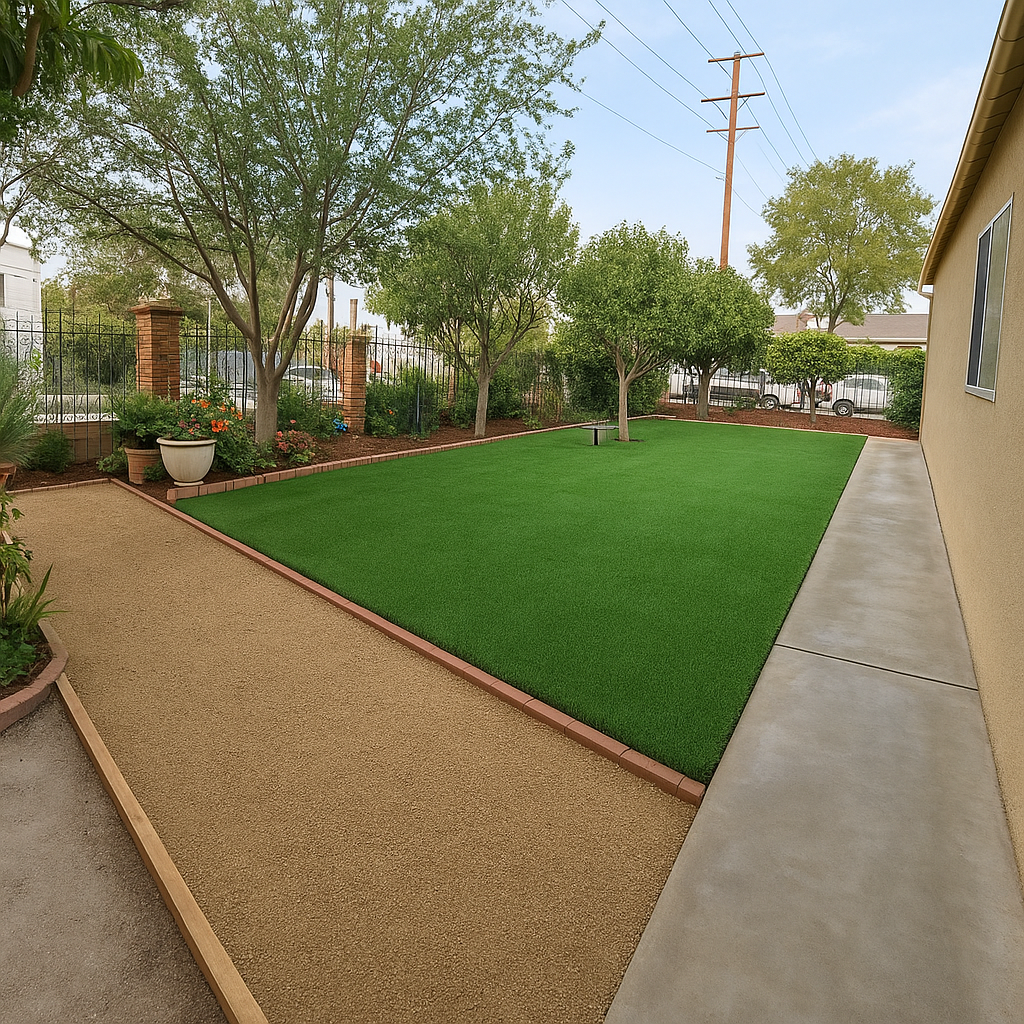
Finish the perimeter by trimming any excess turf for a precise fit. If using a perimeter board, install it before securing the turf. Without a board, carefully cut the turf to align with the perimeter line and nail it down every 3 inches. Once the edges are secured, place nails every 3 square feet across the interior. When nailing, be sure to spread apart the grass fibers to expose the backing—this prevents trapping fibers under the nail head and keeps the nails fully visible for a clean finish.

To apply infill, load 40–50 bags into the infill spreader and set the dial to the desired pounds per square foot. Walk at a steady pace across the turf, evenly distributing the material. Use a Turf Broom or Power Broom to work the infill deep into the grass fibers until no infill is visibly exposed. For edges and tight corners, apply infill manually to ensure complete coverage.
Removing old soil and grass
You will need a sharp shovel, or rent a mechanical turf cutter to remove old grass. Make sure you remove the grass clumps and level the site.
If a sprinkler system is installed, you can pull it up or leave it in place. It's a good idea to pull up any exposed sprinkler heads to help level the ground, and if you or the new homeowner wants to re-sod the lawn, simply reinstall the sprinklers. We expect to dig 2-4 inches down from the ground.
Subbase Preparation
Choosing the perfect sub-base depends on what type of installation you are going for. If you intend to install a putting green, you will need to use decomposed granite to achieve a certain level, while landscaping projects can be done with any crushed stone/concrete mixture, such as a Type 2 road base. A 2-inch layer of base material should be placed on the excavation site, lightly moistened and compacted two or three times. This can be done with a vibratory plate compactor, but smaller applications and hard-to-reach corners should be compacted with a hand tamper. The amount of base material you need to install depends on the depth of the excavation and how much of the pile height you want the artificial turf exposed.
Underlayment
To prevent natural grass from regrowing, it’s recommended to install a landscape fabric—such as our Weed Barrier—either above or below the subbase, depending on local soil conditions.
To ensure the grass blades stand upright, place the turf under direct sunlight for 1–2 hours. Before making any cuts, carefully inspect the material. If seams are needed, start by positioning the largest piece and make rough cuts as necessary—leave a few extra inches around the edges for adjustments. Once the turf is properly aligned, secure one edge with nails spaced 6 inches apart and placed 1 inch from the edge. Use a carpet kicker to stretch the turf for a snug fit, anchoring more nails as you go to keep it taut.
The most common way to join turf pieces is with a parallel seam. To do this, create a 12-inch gap between the turf edges and cut a strip of non-adhesive seam tape to the needed length. Nail down both ends of the tape, then apply a line of Supreme Seam glue along the center. Spread the glue evenly using a trowel or a piece of cardboard. Allow it to sit for about 15 minutes or until it becomes tacky. Then, unpin the turf edges and carefully press them onto the tape, one side at a time. Starting at the center of the seam, secure the edges with nails spaced 1–3 inches apart in a staggered pattern along the seam line.
Finish the perimeter by trimming any excess turf for a precise fit. If using a perimeter board, install it before securing the turf. Without a board, carefully cut the turf to align with the perimeter line and nail it down every 3 inches. Once the edges are secured, place nails every 3 square feet across the interior. When nailing, be sure to spread apart the grass fibers to expose the backing—this prevents trapping fibers under the nail head and keeps the nails fully visible for a clean finish.
To apply infill, load 40–50 bags into the infill spreader and set the dial to the desired pounds per square foot. Walk at a steady pace across the turf, evenly distributing the material. Use a Turf Broom or Power Broom to work the infill deep into the grass fibers until no infill is visibly exposed. For edges and tight corners, apply infill manually to ensure complete coverage.